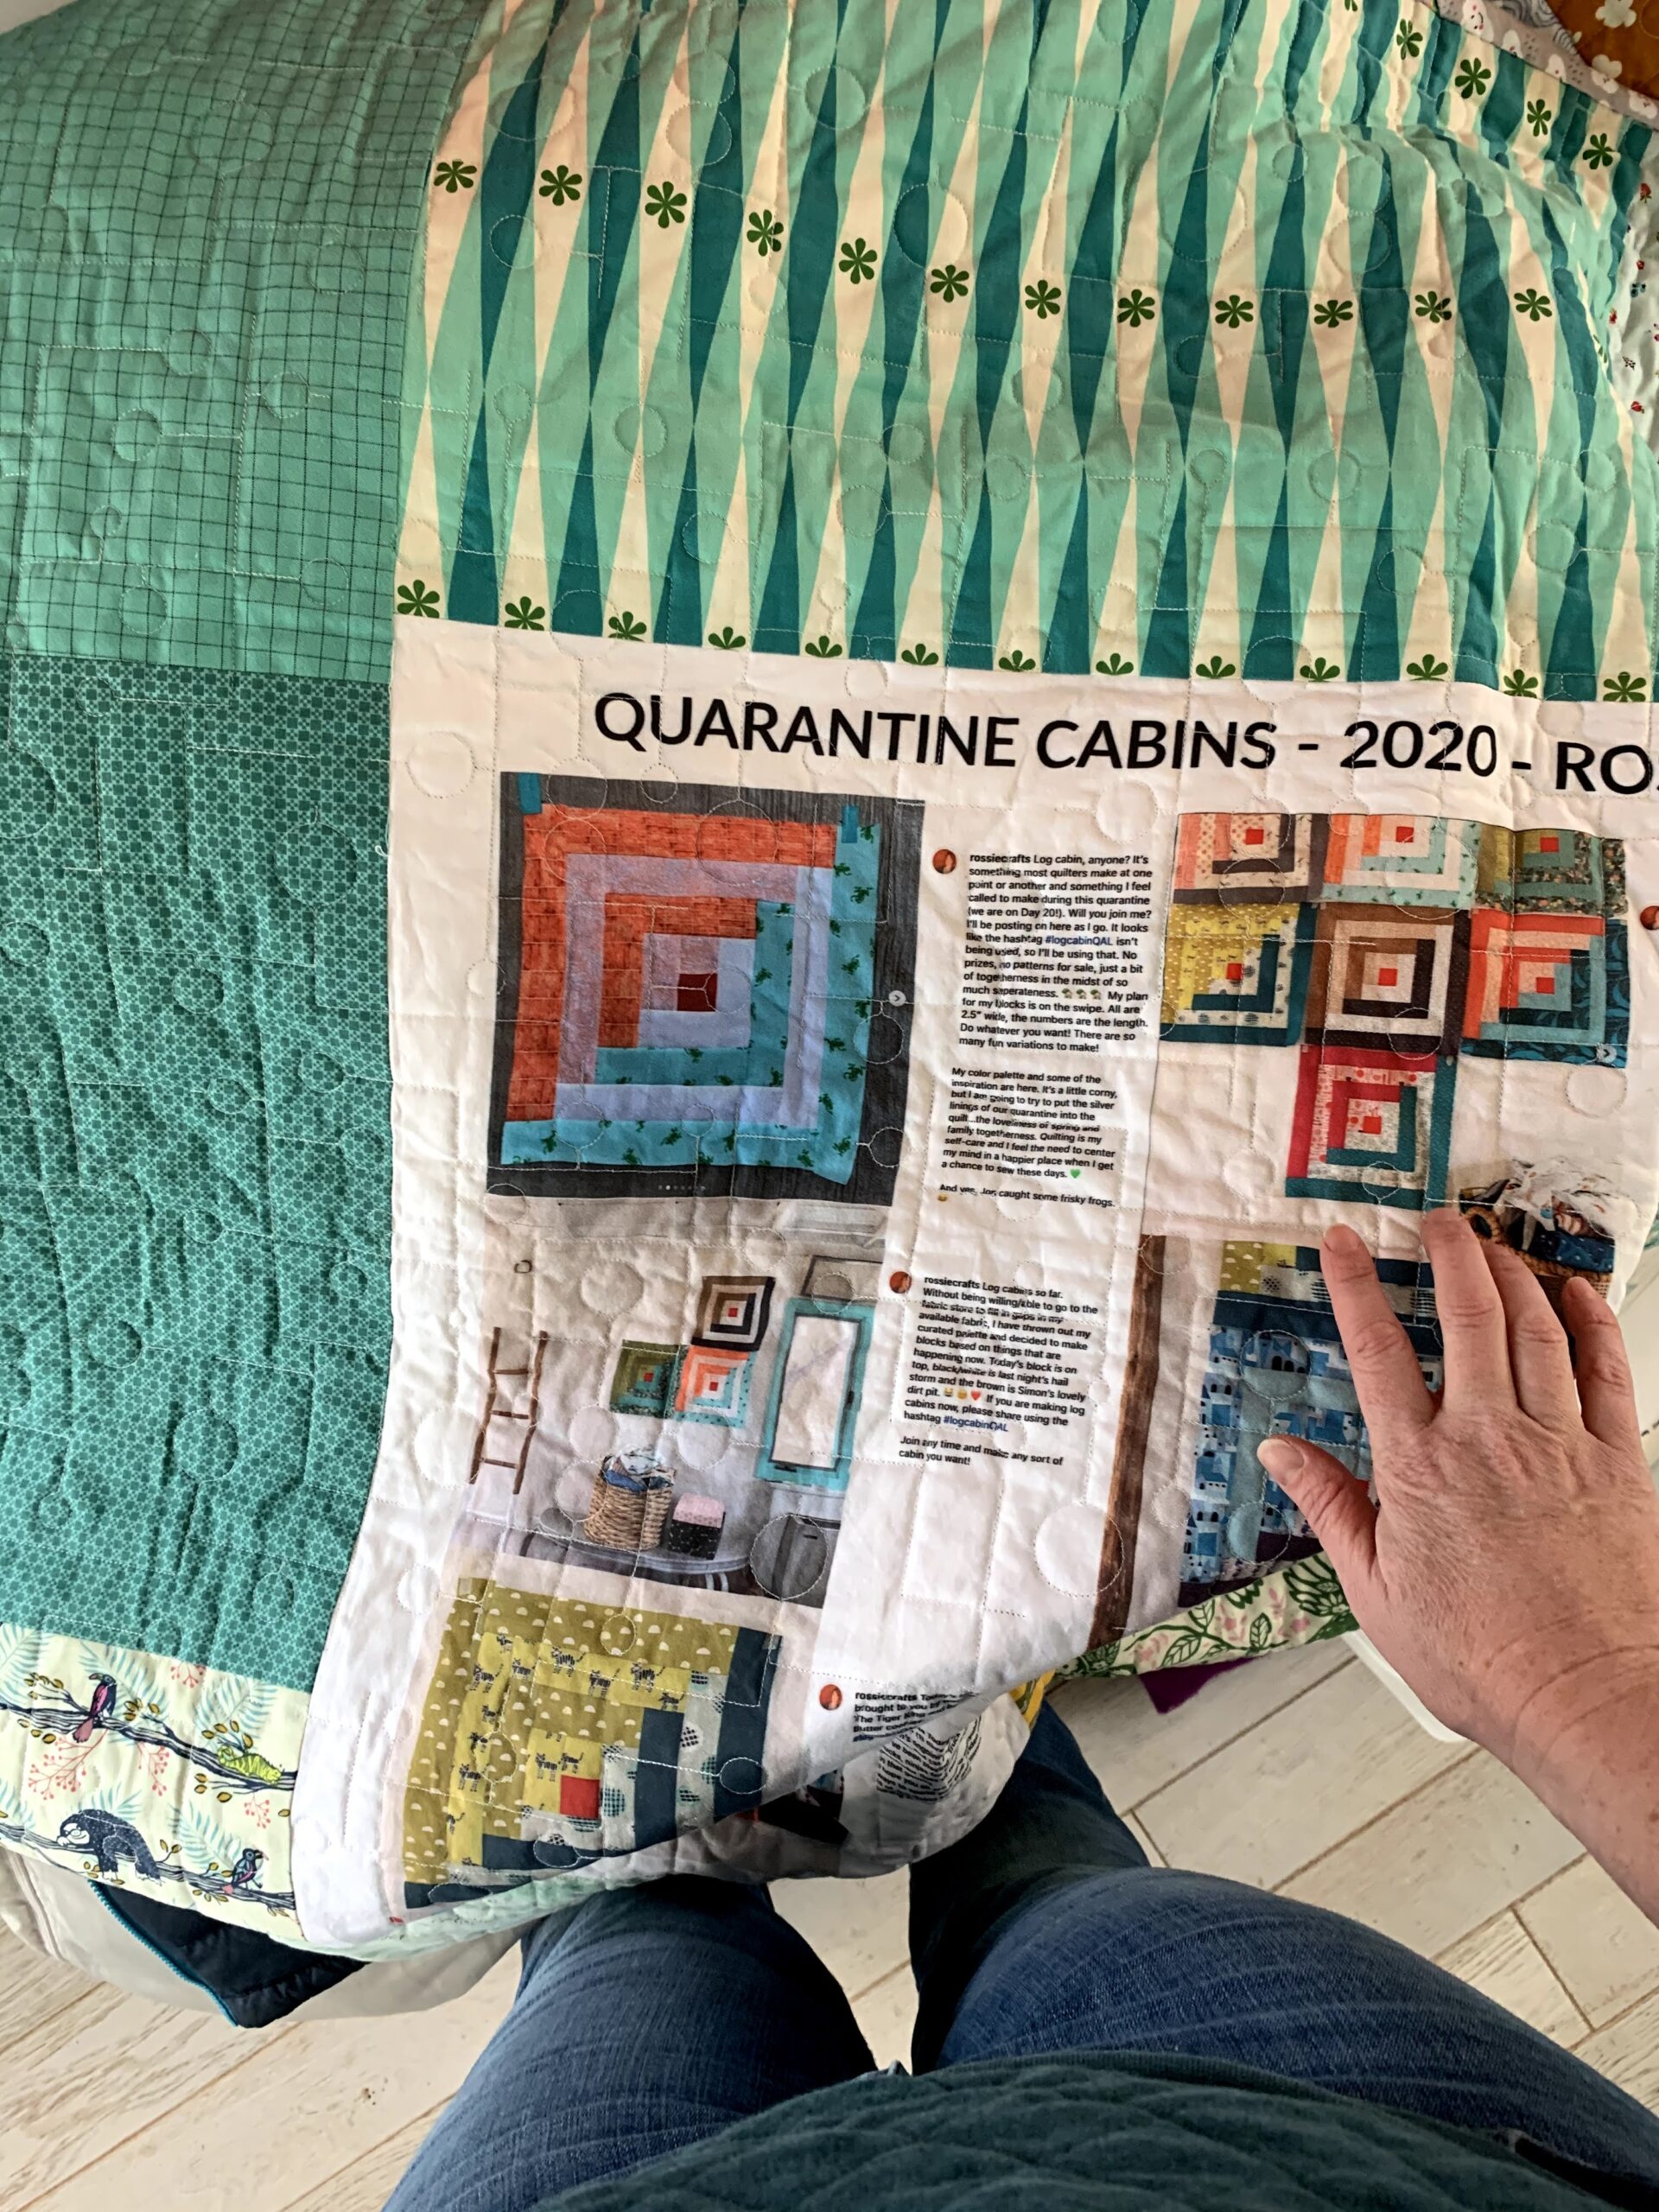
when I made my quarantine log cabin quilt, there was a LOT of information about all the choices in that quilt. Having piled so much meaning into the fabric choices in my quarantine log cabin quilt, and having written about each block as I made it, it seemed like all those words needed to be recorded on the quilt label...

batik sweetness
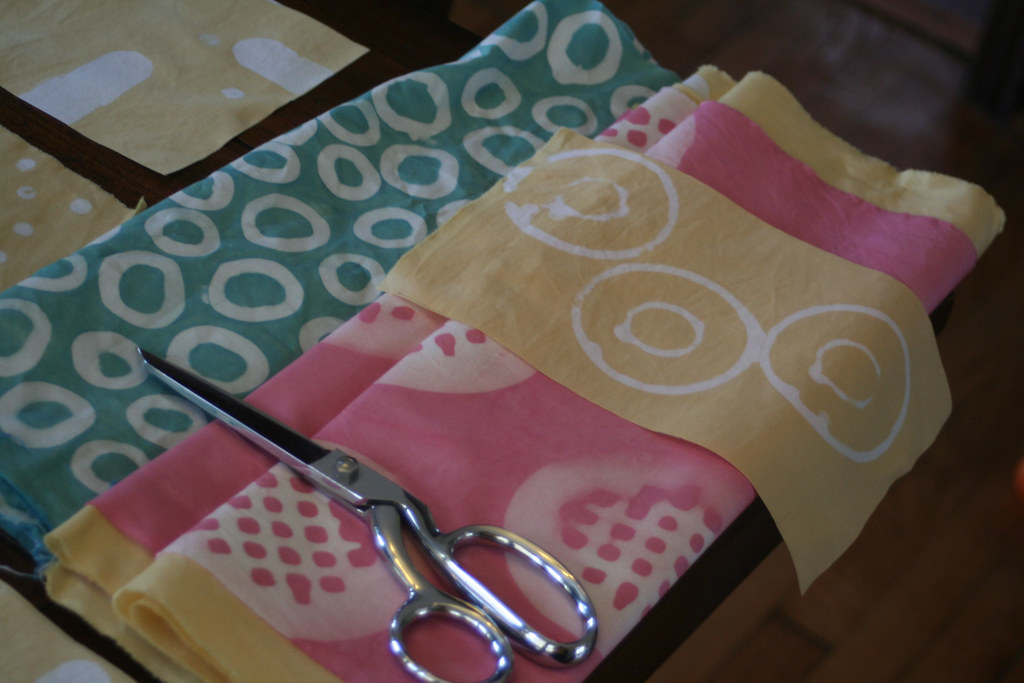
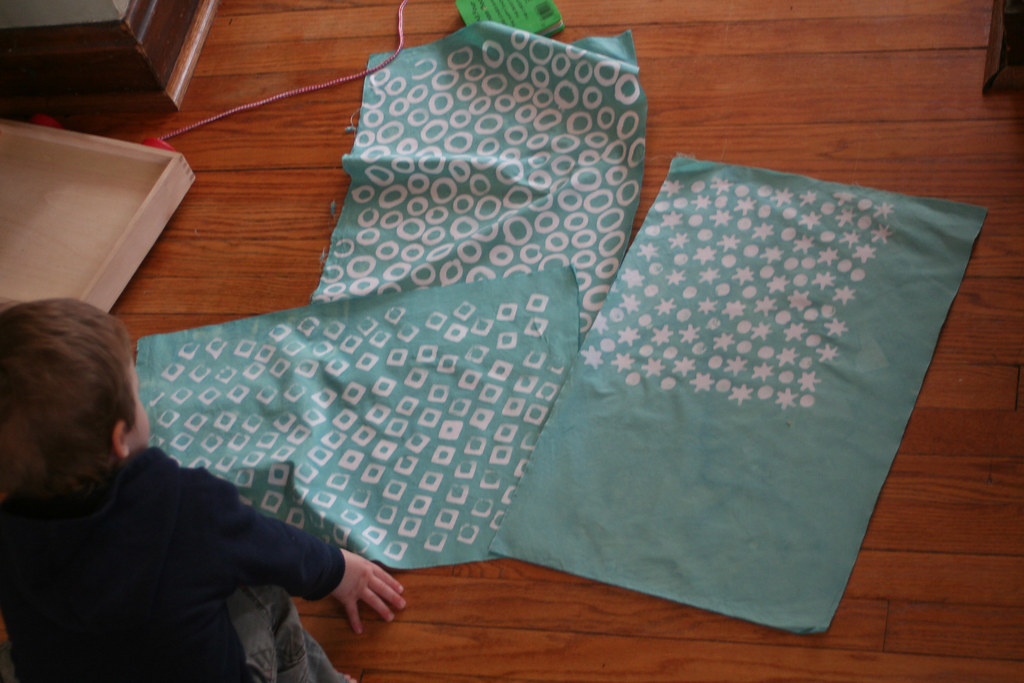
They are done!
If you missed it, the first part of my batik adventure was documented here.
I wasn’t worried about the dying part of the batik equation since I do that all the time (instructions here.)

but I was a bit unsure of how much of a pain getting the wax out of the fabric would be. You see, the fabric comes out of the dyebath still crusty with wax.
The process to remove the wax involves boiling the fabric in a stockpot and then massaging it a bit in warm water (for instructions you should check out Malka’s book)
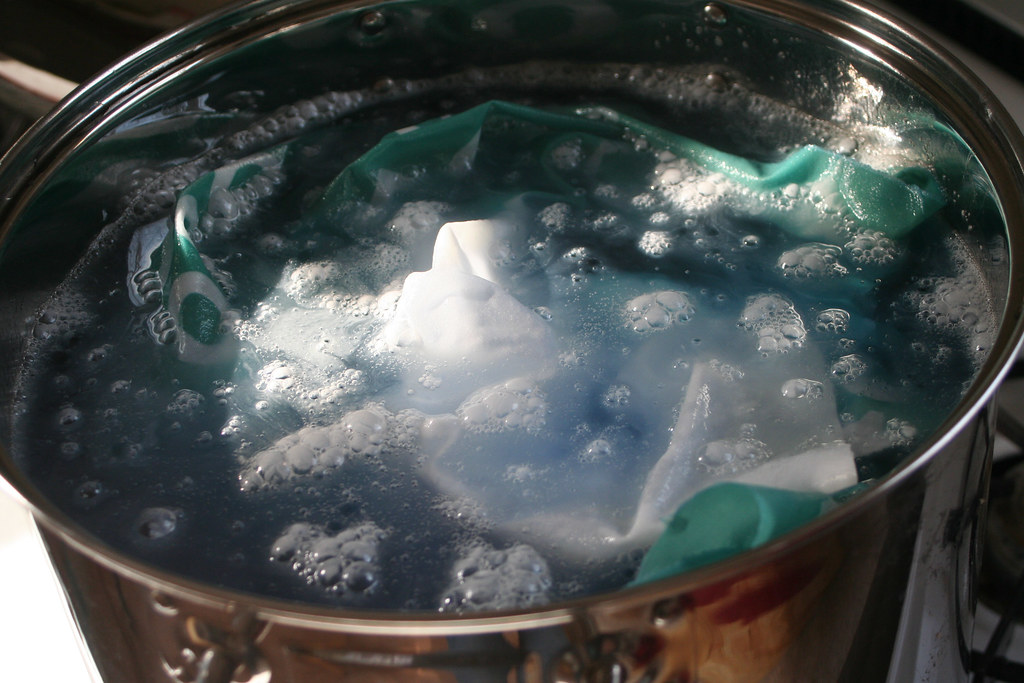
The book says how long to boil the fabric but not how long it might take to massage the wax out of the fabric. Hmm. I was a bit trepidatious about this step anyway because my skin is wussy…really sensitive to heat. Double hmm.
I boiled out the teal fabrics and the undyed tree shape first. I discovered that the massaging process was comfortable and didn’t take too long (10 minutes maybe?) However, when I boiled out the mustard and rose fabrics the next day, it took a lot longer to massage the last bit of wax out. This is probably because the teal fabrics total maybe 1/2 yard and the mustard + rose fabrics are about 1.5 yards. Big difference. And I think the the mustard + rose fabrics were more densely packed with wax, too. I should probably stick to boiling out no more than a yard at a time.
Anyway, the results:
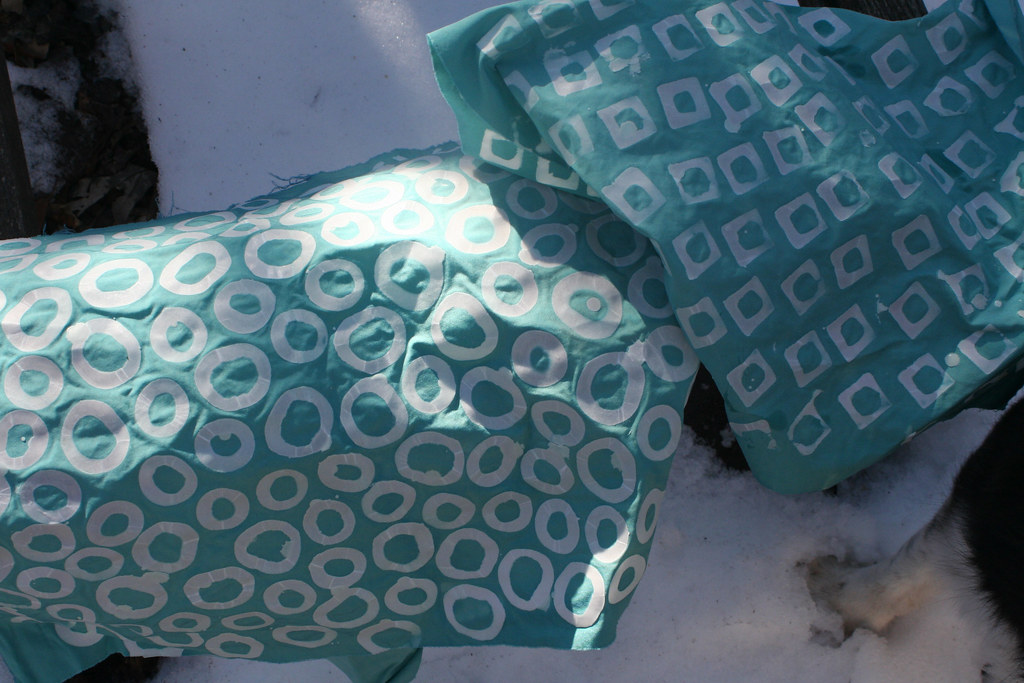
Those big round shapes were made with the drain cover seen in this picture:
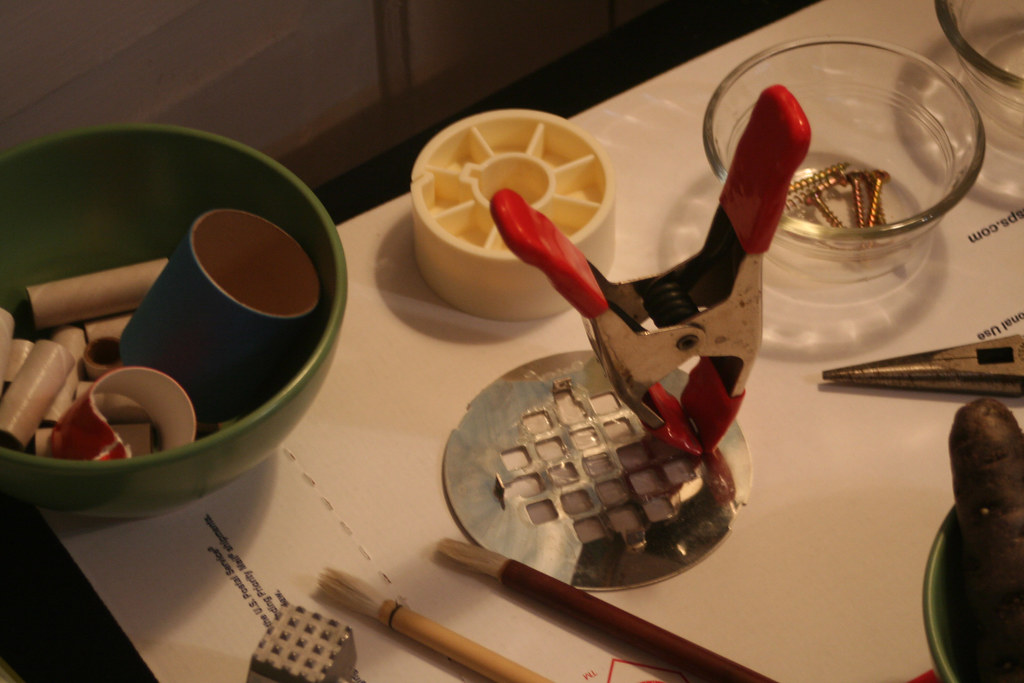
I had been on the lookout for a potato masher in order to copy Malka’s pattern (seen on Flickr). However, I couldn’t find a suitable one (metal, flat-bottomed.) Then, wandering around the hardware store, I saw that drain cover and it was metal and flat with an interesting pattern. It has the disadvantage of lacking a handle, but the clamp held it really nicely (it has a few metal bits that stand up…ripe for grabbing).
After everything had been through the washer, I took the fabrics to show my 2-year-old friend and he said “Pretty!”
and then he gathered them up and ran around with them and said “Rossie? Have it?” Sorry, little dude, you cannot have them. They are going into quilts!
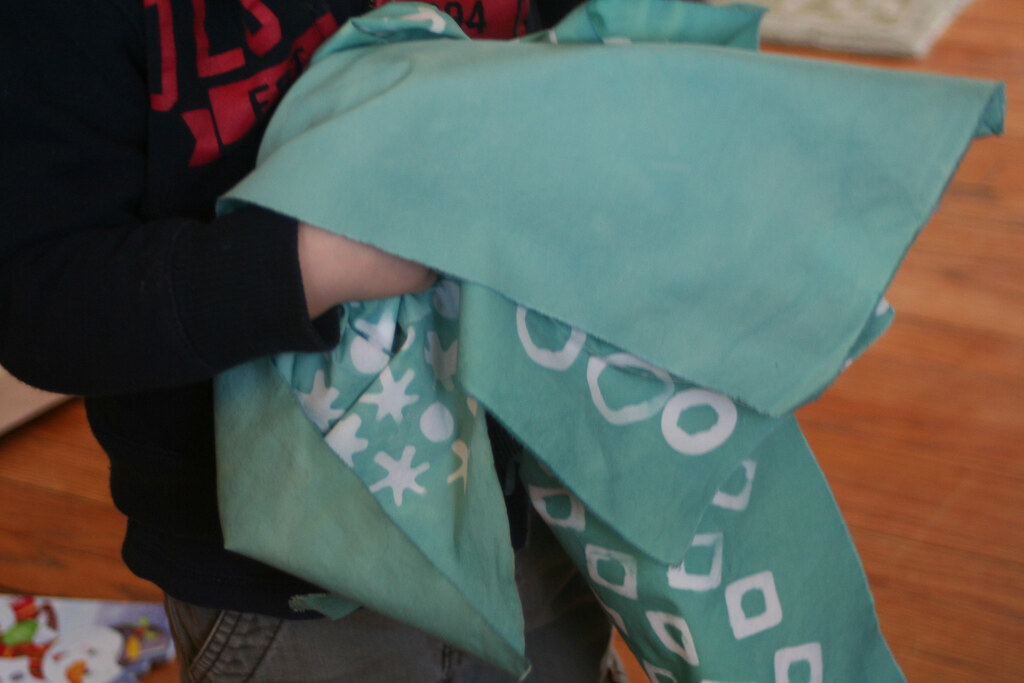
They are really lovely and soft though. I understand his desire to gather them up and high-tail it.
This is the first time I’ve used Pimatex (a high thread-count prepared-for-dye fabric). Apparently the high thread count helps it hold and then evict the wax. Added bonus: it hardly frays! I had to snip maybe three loose threads!
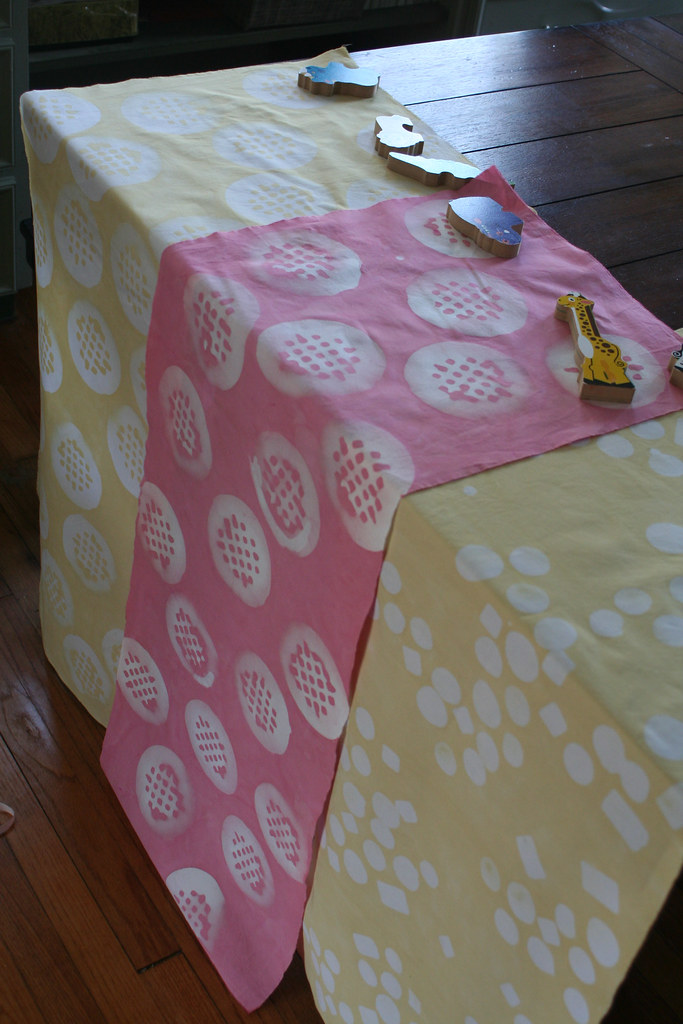
The mustard and rose fabrics have a quilt that they are destined for. Since I knew the size of blocks I would need, I had taken a sharpie and marked out blocks onto one piece of fabric before adding the wax.
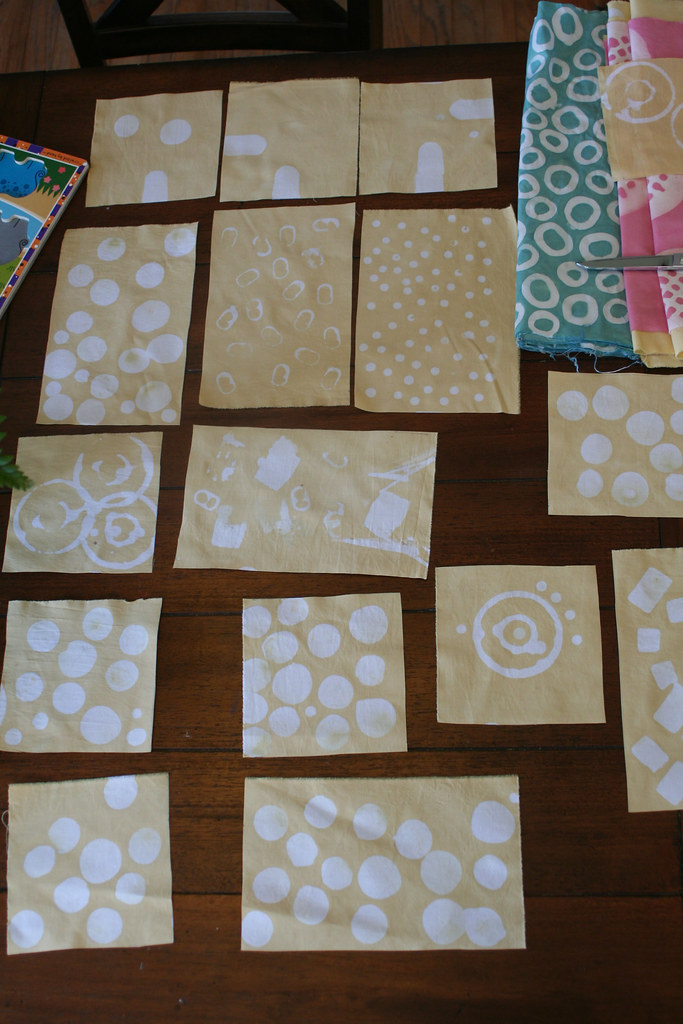
So, some of these are little compositions rather than repeating patterns:

I made the polka dots with a screw.

And yes, next time I’m in the hardware store I’ll be looking for more sizes of flat-headed screws. And drain covers. : ) After all, I still have a frying pan full of wax to use!
Related Posts
This Post Has 12 Comments
Comments are closed.
Your fabrics look amazing! I can't wait to see them in quilts.
those are so cool – can't wait to see what you sew them into!
Fabulous!
I too try to avoid boiling more than 1 yard of fabric in a boiling pot at a time. I have a couple of pots so that when one is done, but the water is too hot to deal with, I can set up a second. I then set the hot boiling pot on the concrete floor in my garage and that helps it cool down quicker so I can dump the water and re-use it.
gorgeous mouthwatering delights.
Oh wow! I so need to spend a weekend this summer doing this. Not much of an option in a small house with two kids underfoot.
Just stunning. Thanks for sharing the process.
I use an iron to remove the soy wax when I do it. Put newspaper down on your ironing surface, fabric in between, another layer of newspaper on top and iron away. Works like a charm!
Wow! These turned out great! I can't wait to see the quilts you make with these.
So cool! I especially love the teal fabric with the ovals…
I say pretty too!
Oh, my goodness, Rossie! I love these. They are fabulous. I have been wanting to try my hand at batik. Your fabrics turned out wonderfully!
[…] you look back at my older posts about batik, you’ll see that the problem I had when following the directions in […]
[…] Eichler-Messmer is has an MFA in textiles and in this book, she teaches her readers how to use Procion MX dyes to make fabric for use in quilts. (That’s the same permanent dye that is used by the apparell industry and that I use when doing itajime and batik). […]