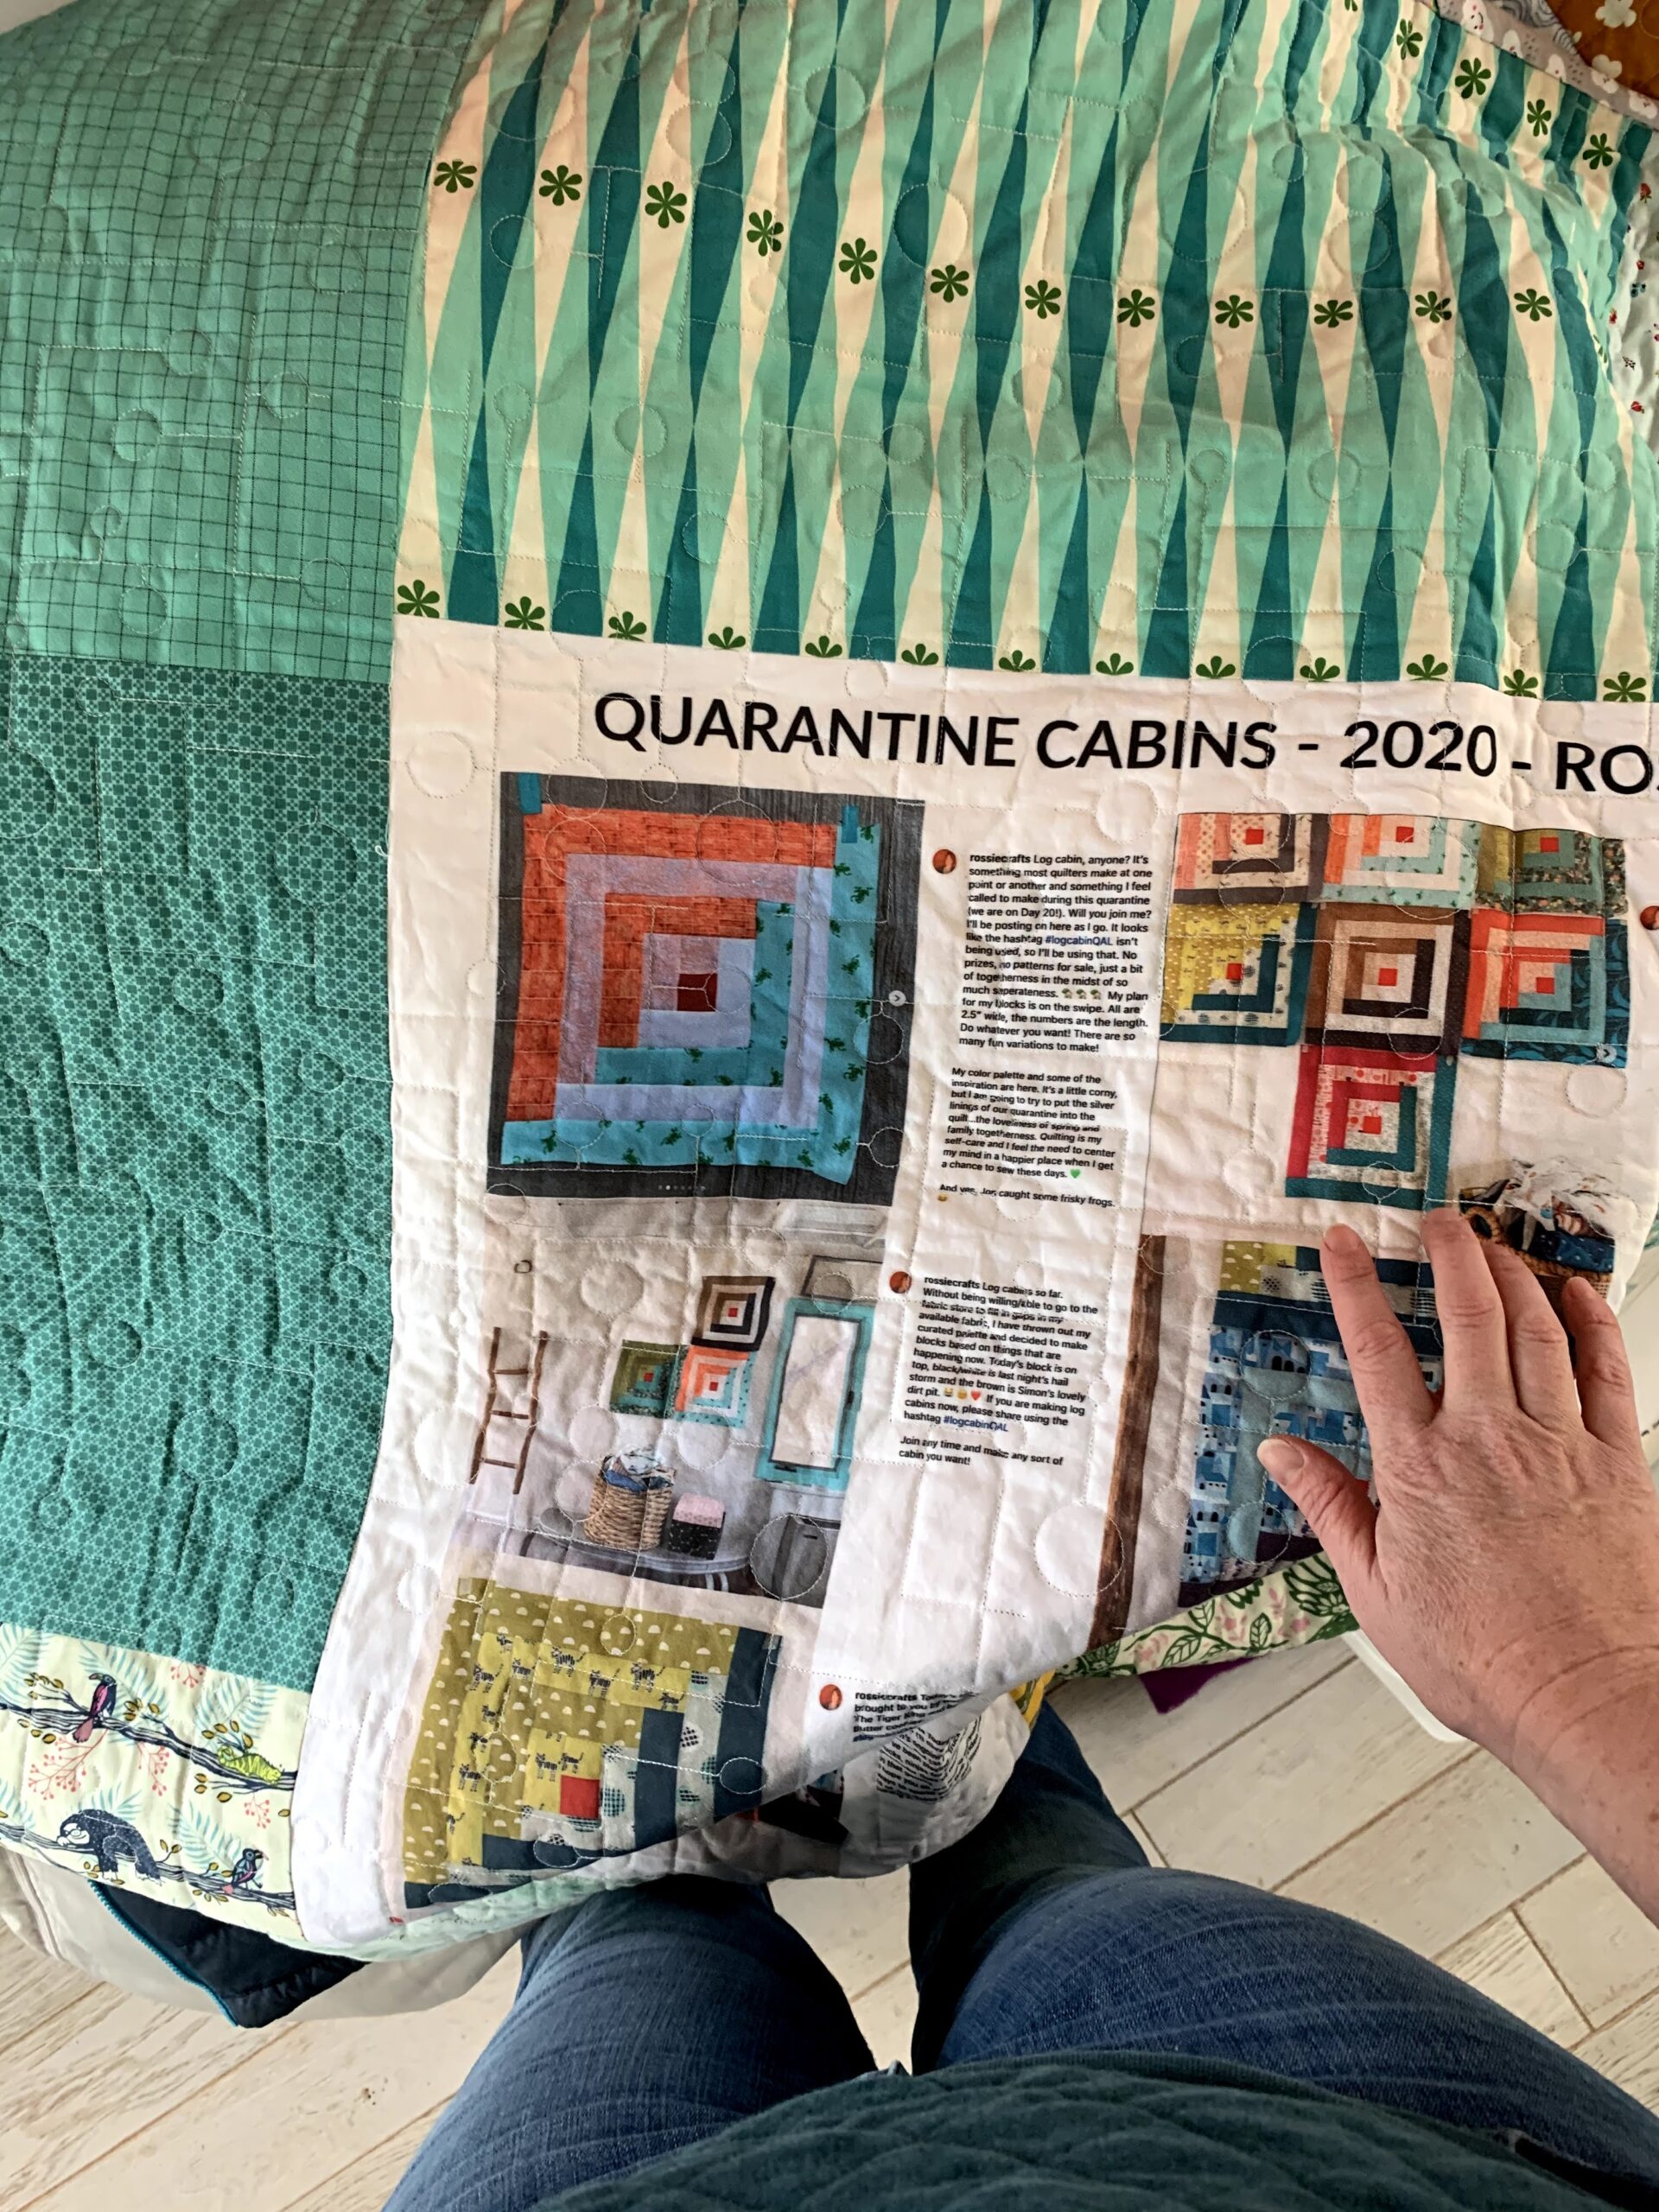
when I made my quarantine log cabin quilt, there was a LOT of information about all the choices in that quilt. Having piled so much meaning into the fabric choices in my quarantine log cabin quilt, and having written about each block as I made it, it seemed like all those words needed to be recorded on the quilt label...
Fabric for Dyeing
1.
Dye Dye Dye
4.
Fabric for Dyeing
I’m slowly making my way through dye 101…
Previously: a post about what dye to use and where to find it.
And a post about how to prepare a dye bath.
Now, how to choose and prepare fabric.
Next, how to clamp your fabric
Then, how to discharge (bleach) your fabric safely.
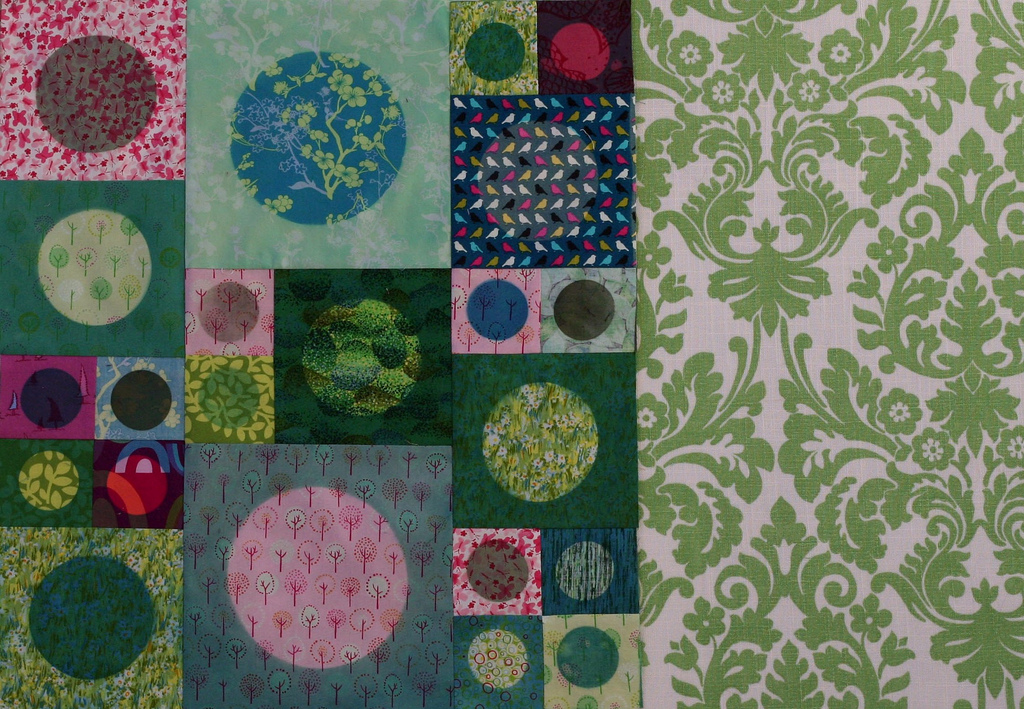
These tutorials are aimed at sharing how how to make quilts like this:
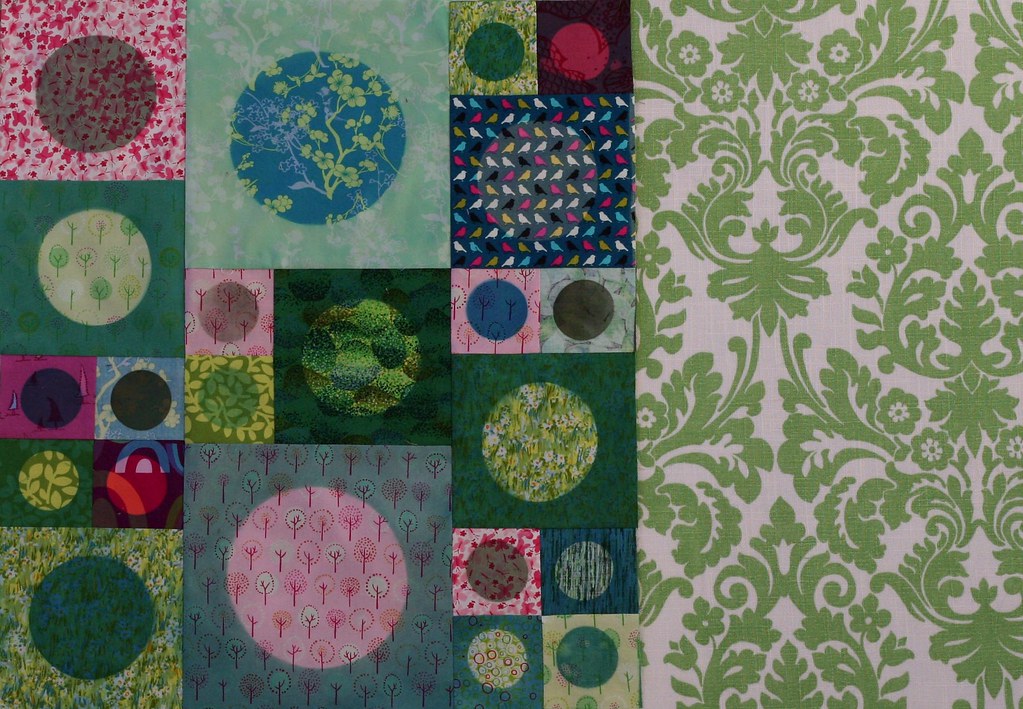
This fabric was overdyed and discharged with an itajime shibori process.

In these examples, the fabric blocks have either had a plexiglass circle clamped in the middle to keep out dye (on the right) or a “reverse twinkle” clamped the block which allowed dye into the circular center, (on the left.)
How to select fabric for maximum effect and minimal frustration:
SOLIDS
If you would like to work up from solid white fabric, I recommend buying Kaufman pimatex PFD fabric. It’s fabric that is “prepared for dyeing” with no whiteners, sizing or softeners. You can find it at Dharma Trading
and Hancock’s of Paducah and many other places.
You can also try PFD Quilter’s Cotton, which has a lower thread-count, but is still quite nice.
I haven’t tried over-dyeing Kona Cottons (the regular, colored solids, not the PFD) in a while, so I cannot comment on how well that might work.
PATTERNED FABRICS
Of course, you probably don’t want to start with a solid. Part of what makes the above quilt so interesting is the fact that the fabrics are already patterned and I’ve added my own twist to these commercial fabrics by over-dyeing (something I learned from Malka Dubrawsky).
A couple of tips when choosing patterned fabrics to over-dye.
1. Use good quality fabrics.
Higher quality fabrics are less likely to unravel as you wash them.
Higher quality cottons absorb dye more evenly.
The pigments used on lower quality fabrics are more likely to resist the dye.
Higher quality cotton can weather discharging (bleaching) without weakening so long as you stop the bleach; lower quality cottons will be weakened by the bleaching process.
2. Use 100% cotton fabric.
Procion dyes are designed to work on plant fibers (cotton, hemp, linen) not animal fibers (silk, wool) or synthetic fibers (polyester). Most quilting fabrics are 100% cotton, but if you are like me and sometimes use discarded clothing or garment fabrics, please know that the dye might not work as well as you’d like. If a fabric is a blend (for example: cotton/poly) the dye will only work on the cotton fibers, so you’ll get a heathered look. If you aren’t sure if a fabric is 100% cotton, just dye a sample and see what happens.
3. Think about value and contrast
Color value refers to the lightness or darkness of the hue. I tend to think of value in terms of “If I photographed this with black and white film, would it be white, black or gray—and if gray, how dark?”


When I am over-dyeing, I want there to be contrast between the part of the fabric that I have over-dyed and the part that I have not. This means that I need to start with either fabric that is either (a) light/medium-light –or– (b) contains a lot of contrast within it.
Here are nine pieces of fabric that were all dyed in the same pink/gray dye bath. Some of these are destined for my Full Stops Quilt, others were just included for instructive purposes.
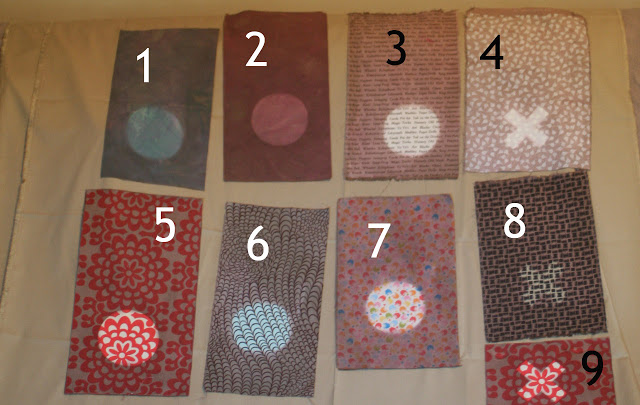

1, 2, and 6 began as medium valued fabrics. I think they work pretty well and am likely to include them in my quilt.
I also really like 3, which was a light fabric.
I don’t like 4 even though the X shape pops pretty well…I included this to show what usually happens to white-on-white prints when you dye them…only the background dyes, not the pigment on top.
5 and 9 are meant to show how well a fabric with a lot of contrast in it can show the shape. I think these are rather ugly, but that’s likely because the color of the dye doesn’t really work with the red and white.
7 is a lower-quality fabric. See how the dye is blotchier? That’s another thing that will happen with cheaper fabric.
8 is a darker fabric and it’s hard to see the shape on it. This needs more work. With darker fabrics, discharging (bleaching) is the answer–I will cover that process in another post.
Here is another look at the above fabric.

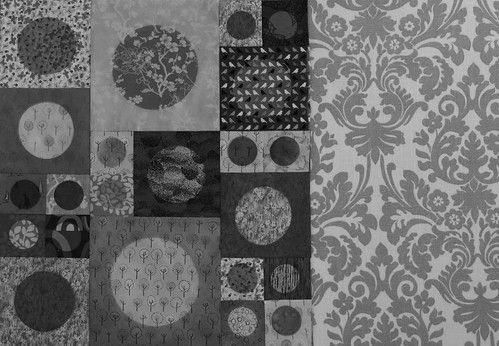
taking a black and white photo can help you to see what’s working. Again, I like 1, 2, 3, and 6 the best. They don’t all show the same amount of contrast, but I like that. I’m not going for a totally uniform look.
Here’s the first image in black and white:
Remember, dyeing is inherently imprecise, when pulling out prints, you’re just doing your best to guess at which fabrics will work. I always dye more pieces that I need so that I can pick and choose when it comes time to patchwork.
4. Once you have selected your fabric, you need to prepare the fabric for dyeing by washing it.
Washing removes any sizing the manufacturer put on the fabric as well as any dirt that may have gotten on the fabric in transit or in the fabric shop.
Here’s how I would break the options for pre-washing:
platinum treatment: wash fabric in hot water with synthropol or warm water with Dharma’s professional textile detergent.
gold treatment: wash fabric with dye-free, fragrance-free, clothing detergent
silver treatment: soak the fabric in plenty of hot water for over an hour, changing the water at least once
bronze treatment: don’t wash, just dye
I’ve done all four of these, and it does make a difference to how your dyeing turns out. But, less of a difference than, say, how often you stir your dye bath in the first 20 minutes. Most of the time I do the gold treatment, or the silver if I’m working with charm packs or other pre-cuts.
In summary:
1. Use high quality fabric
2. Use 100% cotton fabric
3. Select lighter prints for better contrast in the results (save dark prints for discharging)
4. Prewash your fabric
Related Posts
This Post Has 3 Comments
Comments are closed.
What an intriguing process. Thanks.
your info is really helpful. thank you. i am working on a doll quilt and for my idea i need to have my fabrics lightened, as is, and darkened. would you think that overdyeing with a gray or black dye would work to darken??
Procion MX dyes do work with silks as well as cottons. The results are really quite lovely as well!